K&J Plastering, Painting & Carpentry logo

K & J Interiors

Plasterers Yaroomba

Ceiling and wall plastering in Yaroomba, with lighting openings, junctions and the final painted surface considered together.

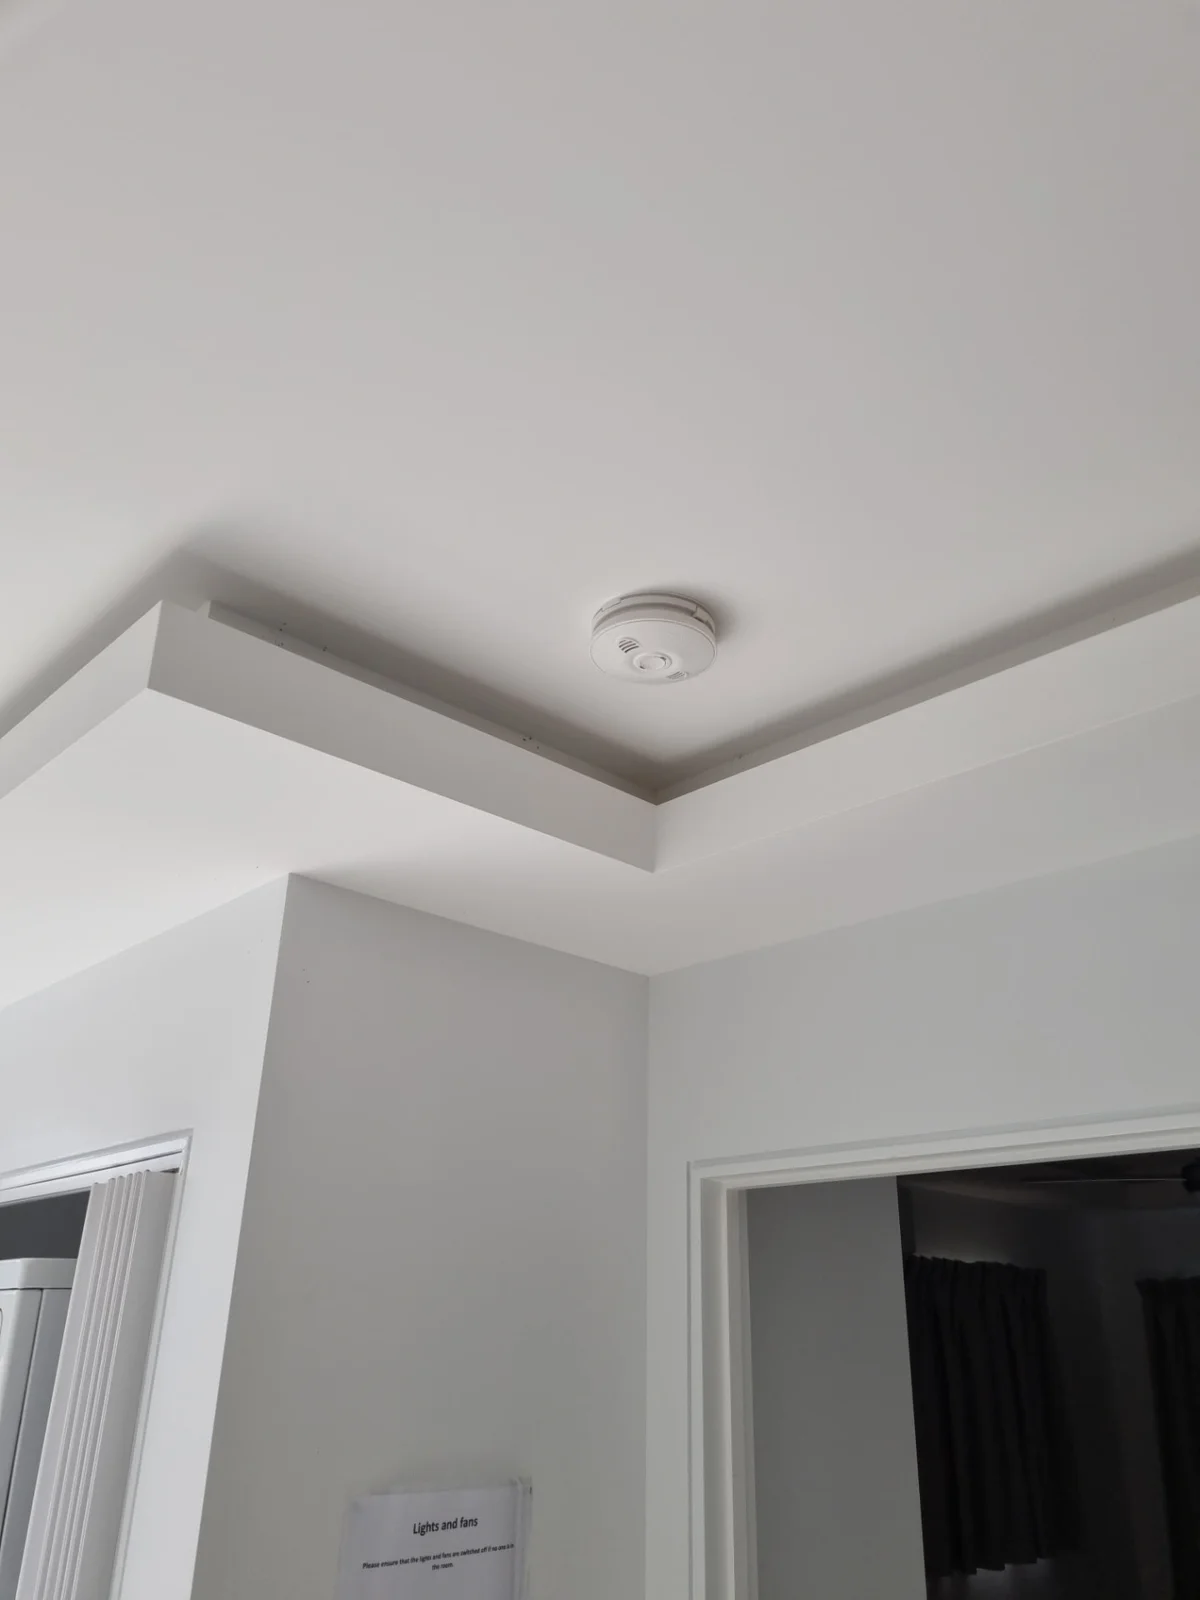
K & J finished painted ceiling corner with a clean square-set junction and bulkhead detail
K & J project photograph · Finished painted square-set detail. Project location not represented as Yaroomba.

Plan the ceiling as a complete visible surface

Changing lights or ceiling details can leave a mixture of redundant openings, new cuts and surfaces that catch light differently. For Yaroomba plastering enquiries, K & J Interiors can discuss those changes as one ceiling scope rather than a collection of unrelated holes. Include the intended lighting layout and the wall junctions around it. Early decisions about bulkheads, cornice and painting help the plastering follow the room design, while electrical work and any concealed preparation remain coordinated with the appropriate trades.

01

Ceiling patches after lighting changes

Mark the old and new fitting positions on a ceiling sketch and photograph the room from below. Electrical disconnection and installation belong with the appropriate licensed trade. Once the required access is complete, the plaster repair can account for backing, joint preparation and the relationship between several openings in the same surface.

Plan ceiling reinstatement
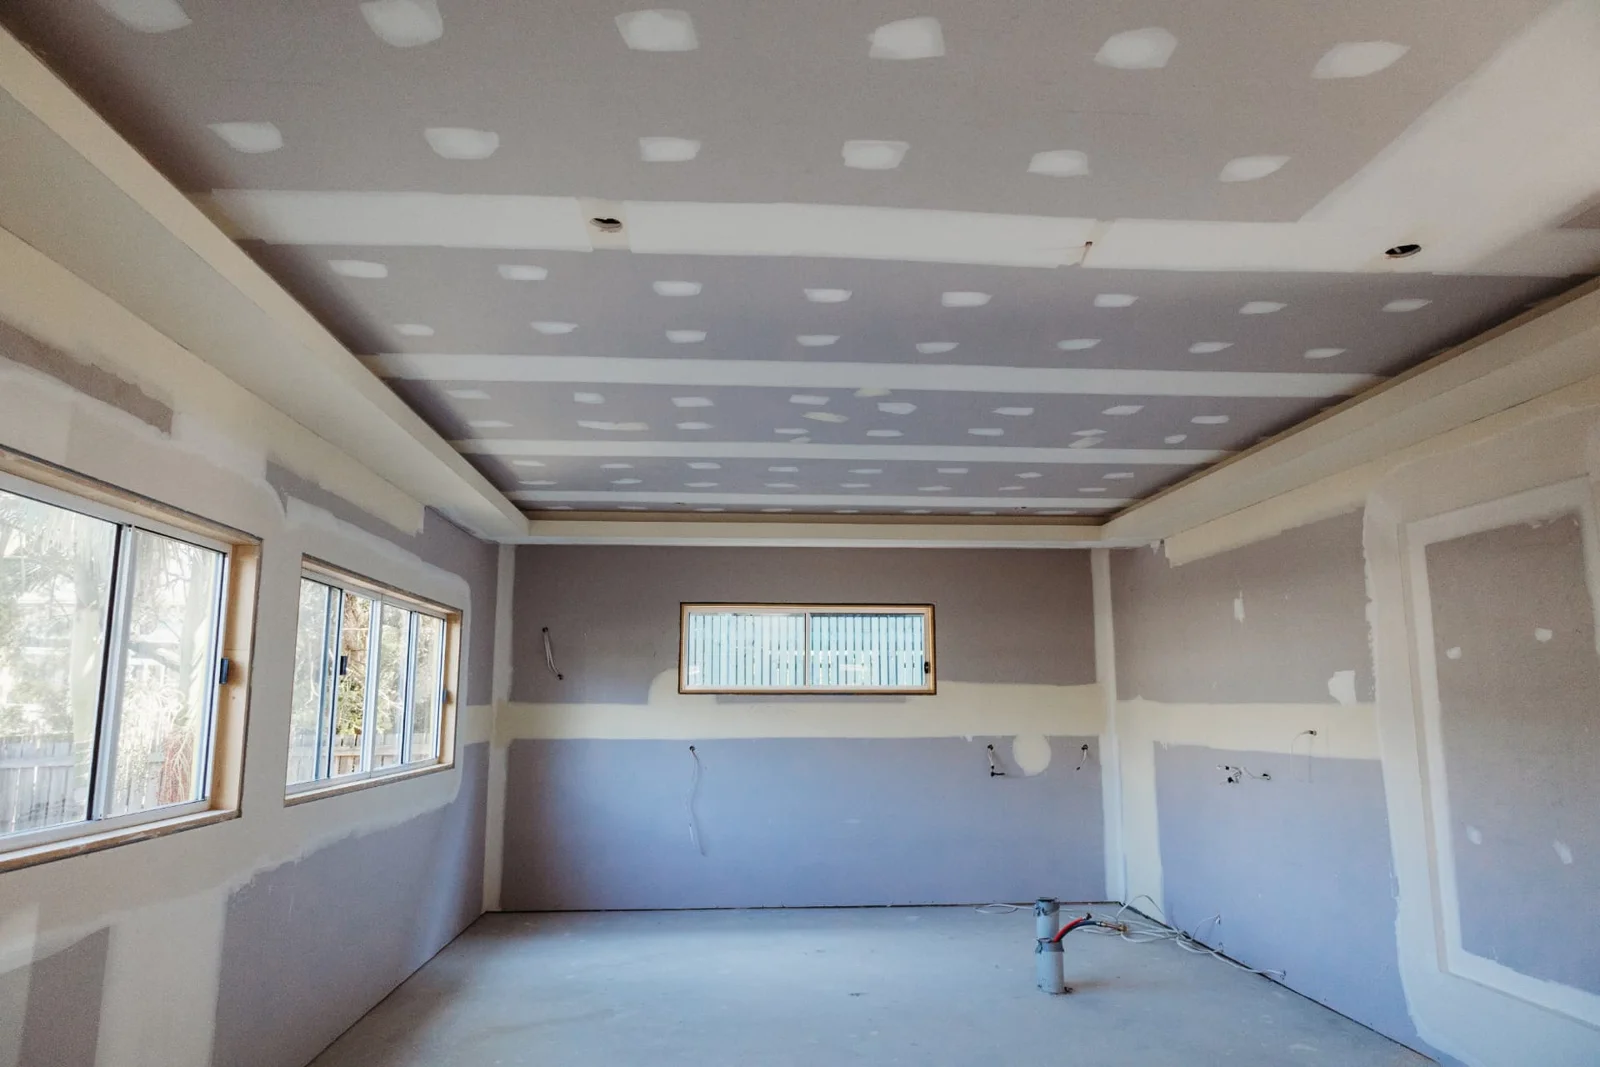
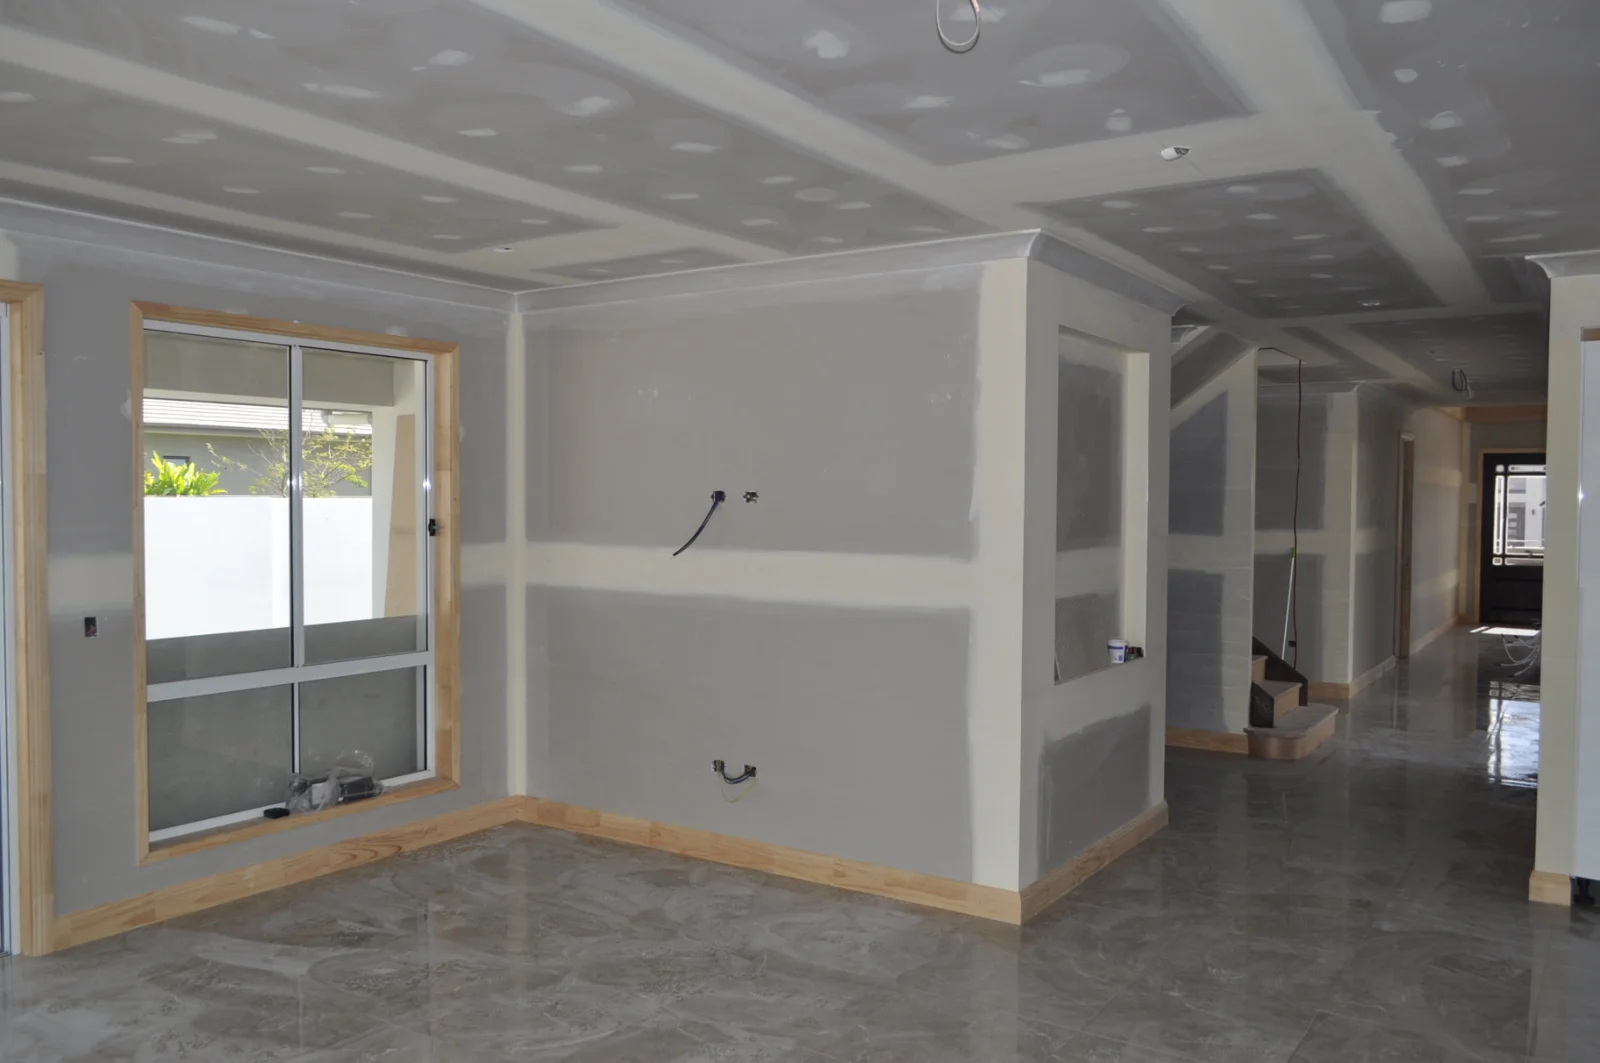
K & J plasterboard ceiling and walls with visible joint compound before sanding and painting
K & J project · Wall & ceiling installation · Joint setting in progress

02

Bulkheads around the lighting layout

A bulkhead needs a defined shape before its lining can be specified. Show level changes, corners and any openings alongside the lighting plan. Suitable framing and coordinated services are important, particularly where the finished edges remain prominent. Include the intended wall junction and paint coverage as part of the same detail.

Discuss bulkhead plastering
K & J bulkhead and square-set ceiling junction during joint setting
K & J project · Bulkhead & square-set construction · Setting in progress

03

Cornice or square-set ceiling edges

Choose how the altered ceiling will meet the walls before existing cornice is removed. Retained profiles, exposed wall edges and the condition of the junction influence preparation. If different treatments meet within one room, identify the exact transition so the lining and finishing work can be planned around a deliberate endpoint.

Choose the ceiling junction
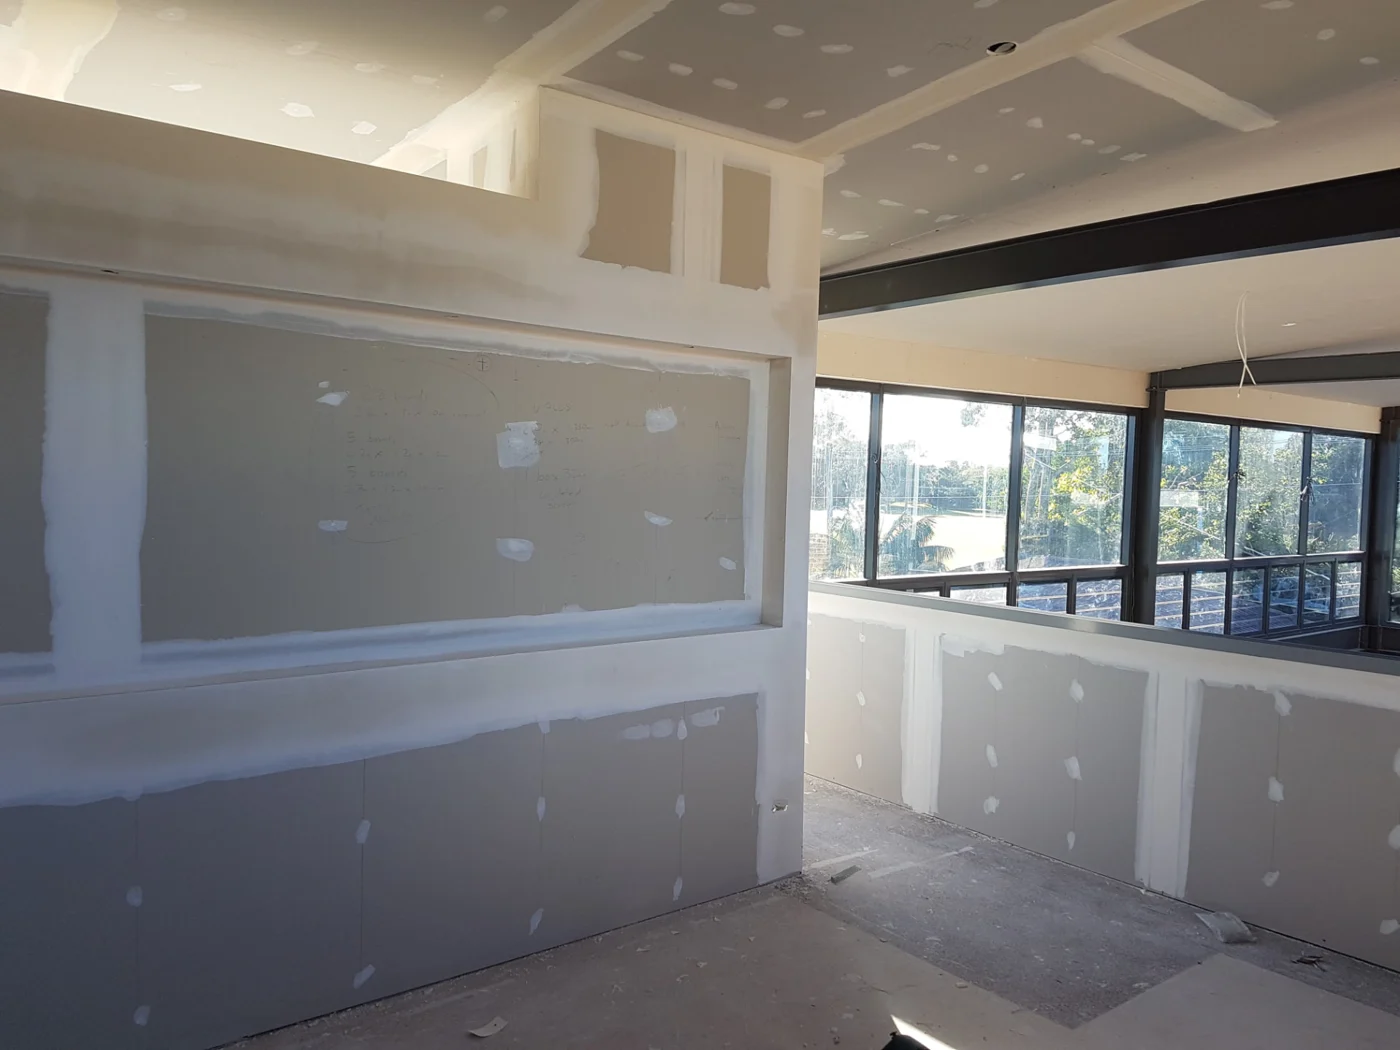
K & J cornice and room linings with plasterboard joints being set
K & J project · Cornice & room linings · Setting in progress

04

Wall repairs from relocated controls

Moved switches, wall lights or other fittings can leave smaller openings away from the main ceiling work. Include these on the room list and confirm that concealed electrical work is complete before closure. Show the surrounding wall finish so backing, patch preparation and any broader repainting can be considered together.

Repair altered wall surfaces

05

Painting under the intended room lighting

Discuss the final lighting arrangement when defining the painting scope, because surface irregularities can become more noticeable under some light directions. New compound and retained coatings need appropriate preparation. State whether the complete ceiling and adjoining walls are included, rather than expecting isolated paint touch-ups to produce a uniform room finish.

Specify ceiling and wall painting

Detailed plasterboard setting, before the paint stage

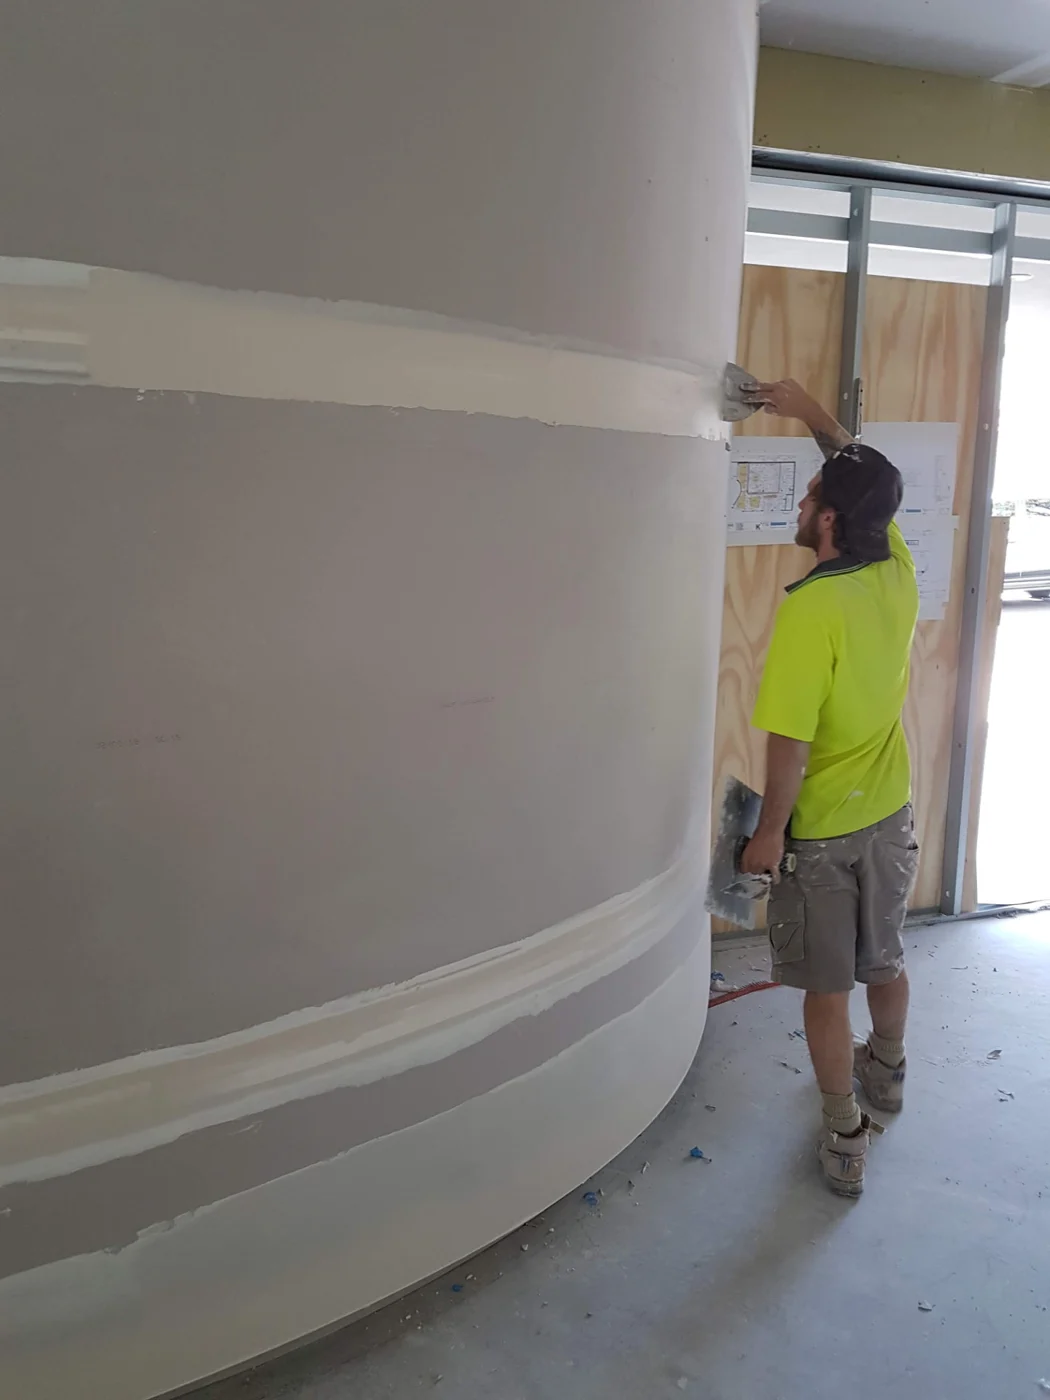
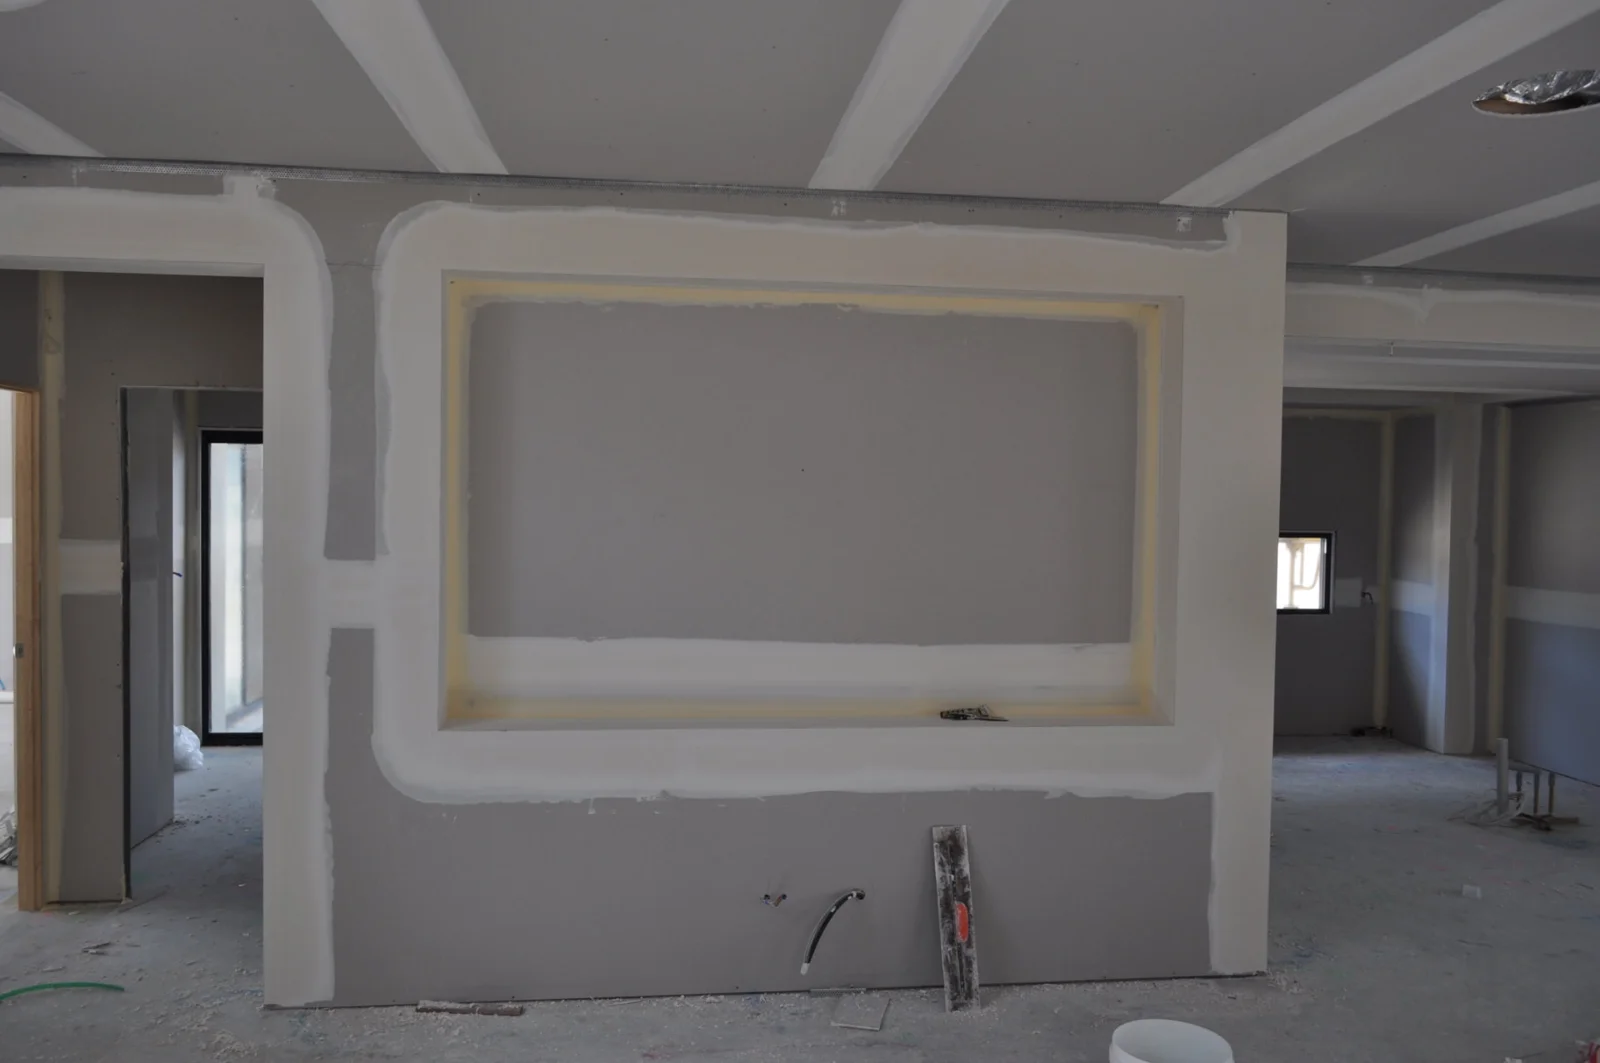
K & J photographs show curved-wall setting and a recessed plasterboard feature. These examples illustrate detailed finishing work, not verified Yaroomba project locations.

K & J plasterer applying joint compound to a curved plasterboard wall
K & J project · Curved-wall plastering · Compound being applied
K & J recessed plasterboard niche with corners and joints being finished
K & J project · Recessed plasterboard detail · Setting in progress

Distinguish planned openings from damaged ceiling lining

An opening left by a removed fitting is different from board that is cracked, loose or moisture-affected. Identify both on the ceiling plan so the repair discussion covers the condition of the retained lining as well as the new layout. Sagging or loose material needs assessment before work proceeds beneath it.

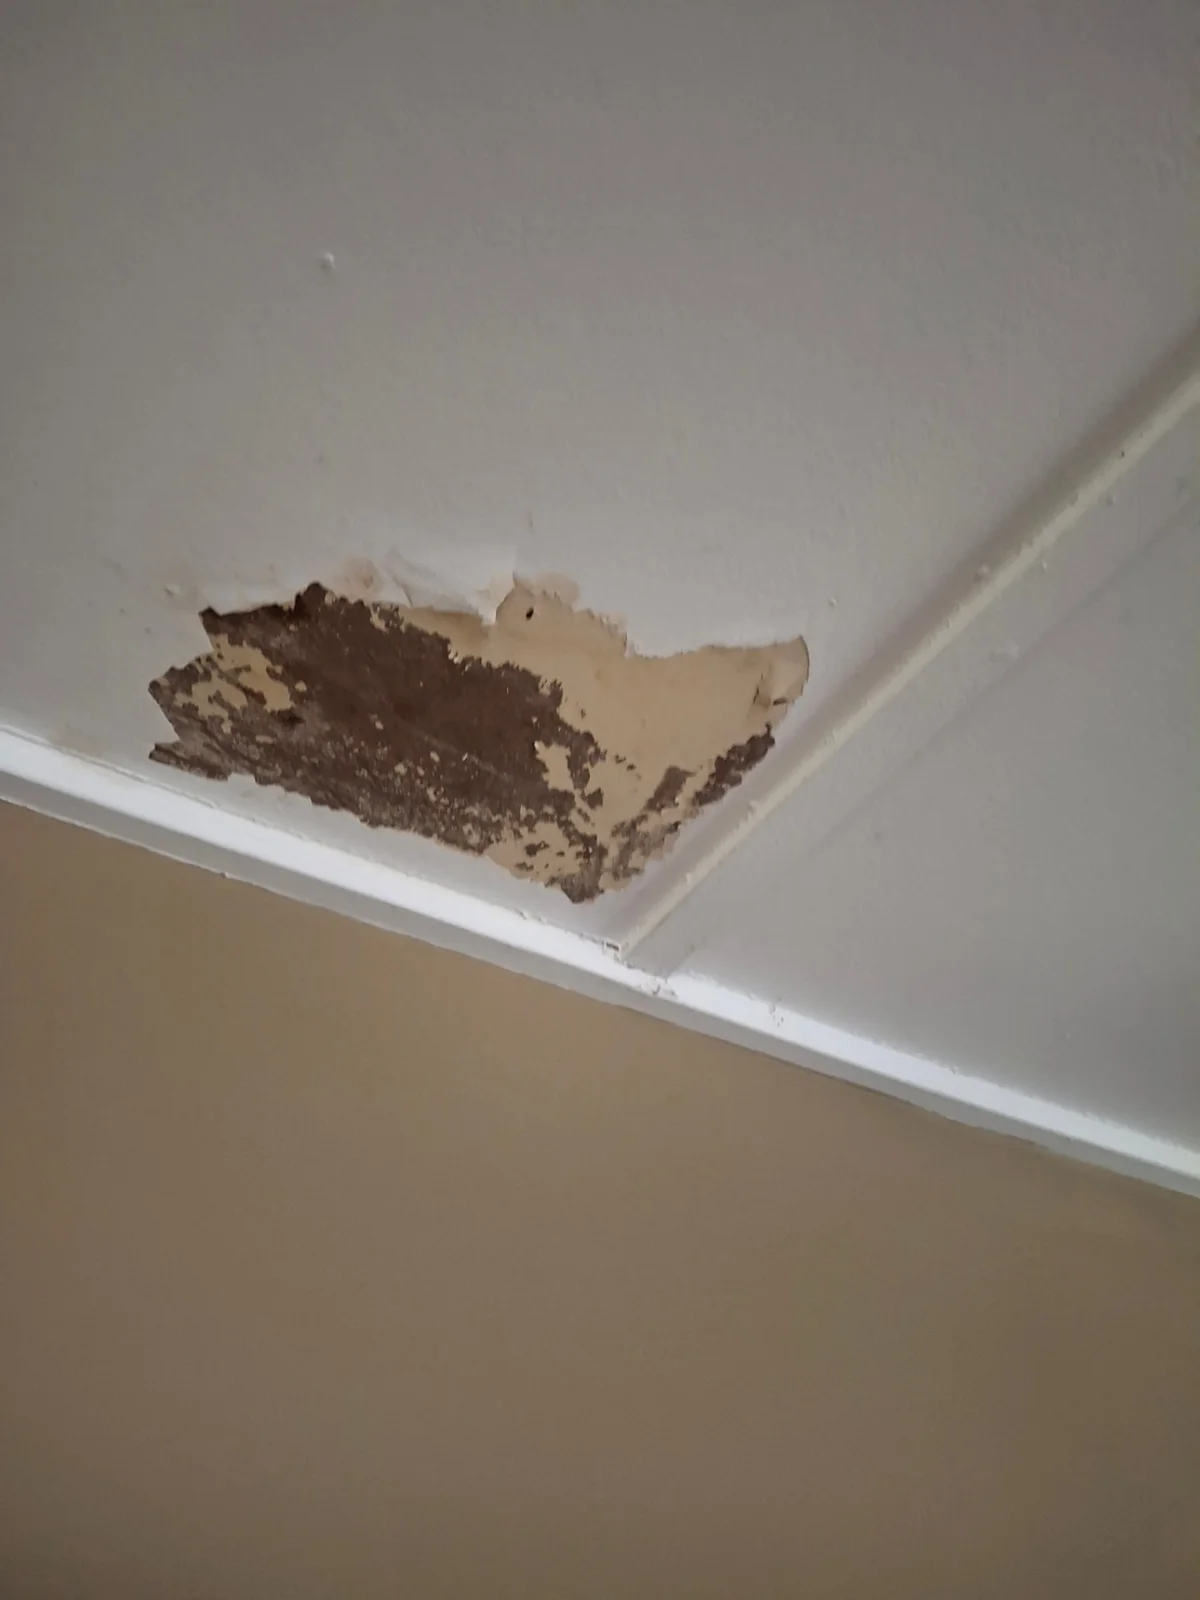
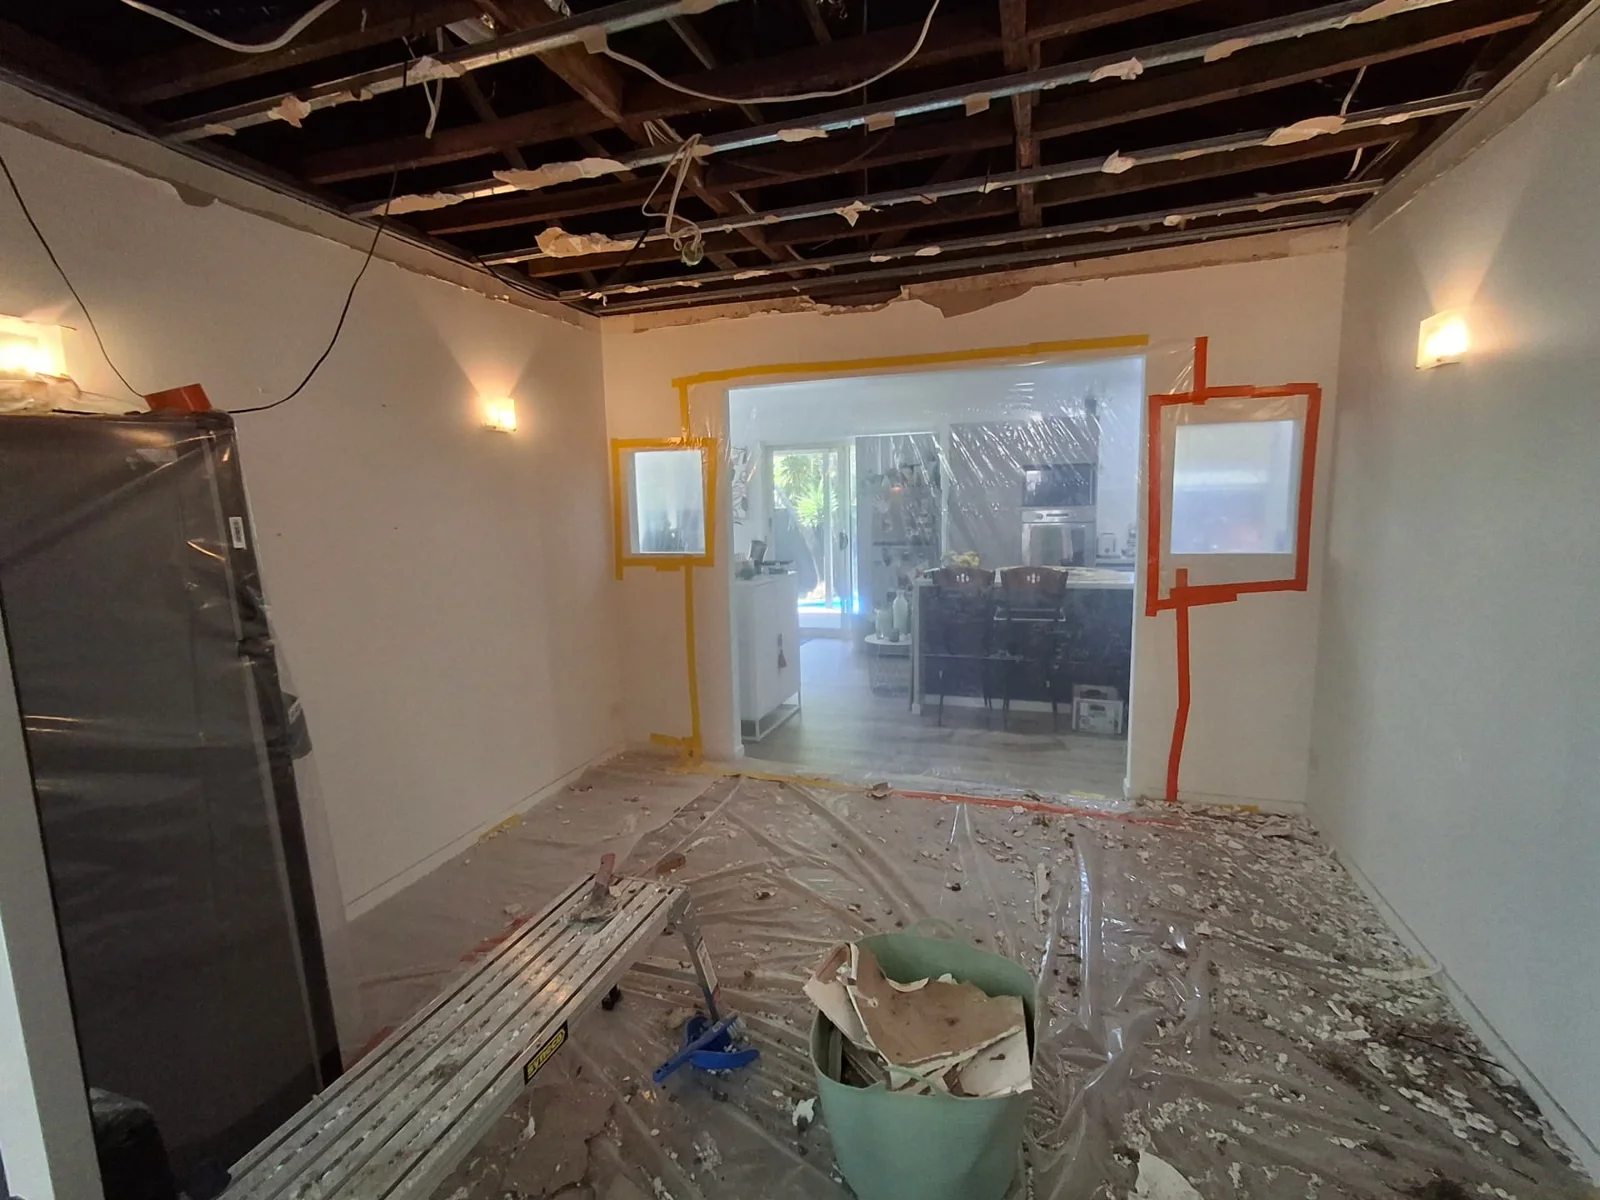
Where staining suggests a possible leak, arrange investigation and required drying before reinstatement. Any specialist mould treatment is separate from replacing plasterboard. The photographs below show damaged lining and exposed framing at different stages; they are not a completed Yaroomba ceiling repair.

K & J project showing damaged ceiling lining with peeling surfaces before repair
Before repair · Damaged ceiling lining
K & J project showing exposed ceiling framing after lining removal
Strip-out stage · Ceiling lining removed

Connect the lighting plan to the plaster finish

  1. 01

    Overlay old and new positions

    Show removed fittings, proposed openings and retained ceiling details on one room sketch.

  2. 02

    Complete the concealed work

    Coordinate electrical work, framing and any required investigation before repair or replacement lining closes the ceiling.

  3. 03

    Finish the full viewing surface

    Confirm junction details, setting and sanding, then specify paint coverage across the ceiling and affected walls.

Yaroomba and the communities around Coolum

Council identifies Yaroomba alongside Point Arkwright and Mount Coolum among the communities surrounding Coolum Beach. This places a Yaroomba enquiry within the northern coastal part of the Sunshine Coast without making assumptions about the age, construction or condition of the property.

If building management applies, include work-hour requirements and the route available for moving materials. Otherwise, describe the actual room access and ceiling height. A lighting alteration enquiry should also identify the coordinating electrician. Nearby existing service information covers Coolum Beach, Marcoola and Mudjimba.

Yaroomba ceiling alteration questions

Should the lighting plan be final before plaster repairs start?

Confirm positions and required access with the electrician first. Repairing redundant openings before the new arrangement is settled can lead to additional cuts and repeated finishing work.

Can several downlight holes be repaired without replacing the ceiling?

Possibly, depending on spacing, support and the condition of the surrounding lining. Show all openings on one plan so local repairs and any larger replacement section can be considered sensibly.

Will new lighting make old ceiling patches more visible?

Some lighting directions can highlight surface variation. Include the proposed lighting arrangement when discussing preparation and the finish, particularly if a complete ceiling repaint forms part of the project.

Does removing cornice automatically create square set?

No. The exposed wall-to-ceiling junction needs suitable preparation and detailing. Its condition and support must be considered before the square-set scope is agreed.

K&J Plastering, Painting & Carpentry

Request a plastering quote in Yaroomba

Send a ceiling sketch with old and new fitting positions, room photographs and the junction finish you want. Include electrical readiness and painting requirements.

Plastering • Painting • Carpentry

  • Experienced local tradespeople

    Over 10 years of experience delivering quality finishes.

  • Licensed & insured

    QBCC licence 15438315.

  • Photos & plans welcome

    Upload your job photos or drawings with your enquiry.

  • Yaroomba & surrounds

    Residential plastering, painting and carpentry enquiries.

Prefer to talk? Call 0404 070 587

Request a Free Quote

Fill in the details below. You can also attach photos or plans.